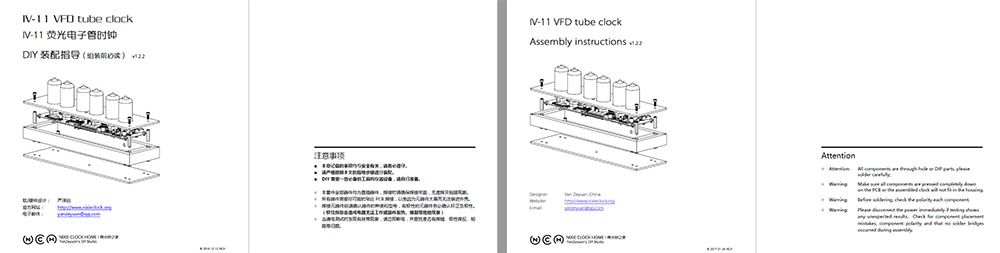
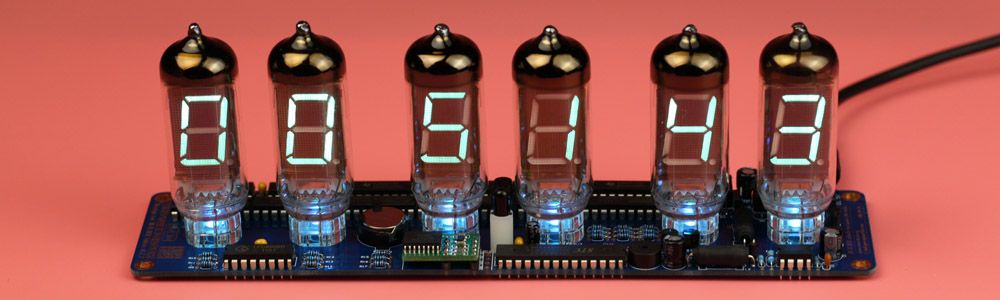
新款IV-11荧光电子管时钟 | New IV-11 VFD Tube Clock
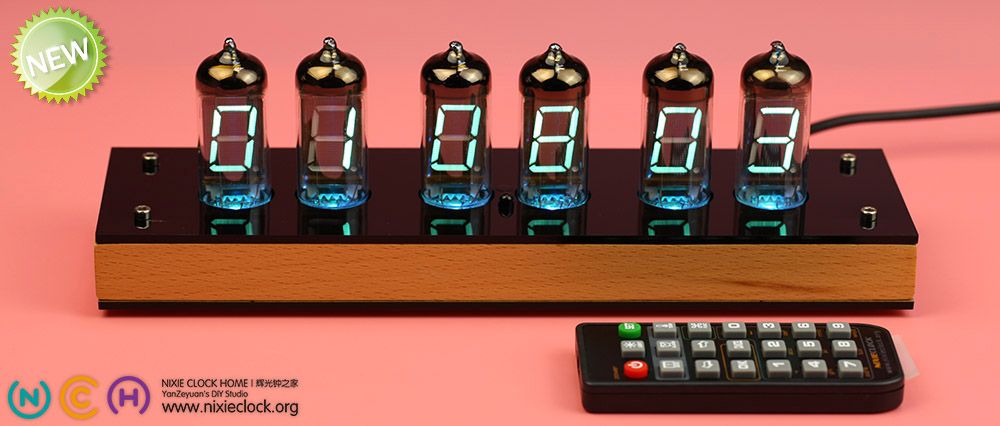
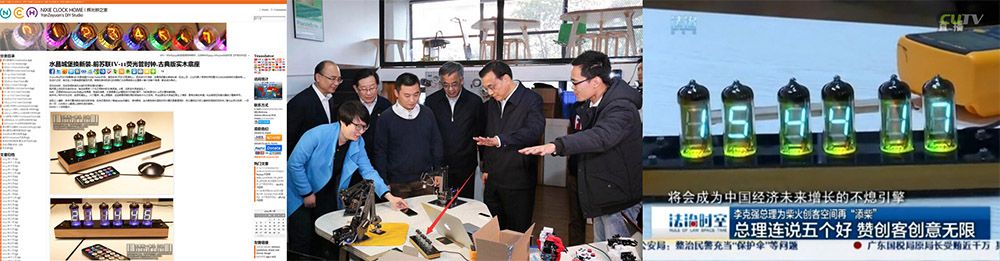
5年前,我发布了第一款IV-11荧光电子管时钟作品(原帖链接),记得在当时,国内很少有人知道有IV-11荧光电子管的存在,由于IV-11比当时国产YS18-3荧光电子管尺寸上要大不少,而且搭配了实木底座和亮黑色面板,所以一发布便受到了朋友们的喜爱。2015年李总理访问柴火创客空间时还曾赞赏过这件作品,并且曾在电视新闻栏目里进行过报道。在这5年间,这款IV-11荧光电子管时钟畅销美国、俄罗斯、澳大利亚及欧洲大部分国家(IV-11时钟世界分布图)。
Five years ago, I released my first IV-11 VFD Clock works (link of original post), few Chinese people know about IV-11 VFD tubes at that time, because the size of IV-11 is bigger than YS18-3 (Chinese VFD tubes), and I designed a hardwood base with bright black plates, so it become more and more popular after released. In 2015 during Chinese Premier Li Keqiang visiting Chaihuo Maker Space, he praised this work and has been reported in the tv news. In the past five years, this IV-11 VFD tube clock sells well in Europe, North America, South America, Australia (my IV-11 clock world distribution map).
同时,IV-11荧光电子管时钟它不仅仅是一件完成品,我还为热爱DIY的朋友们准备了全套的DIY套件,而且最重要的一点是设计这款时钟所使用的所有电子元器件都是直插零件,无任何贴片元件,这也就意味着大大降低了DIY焊接的难度,DIYer不需要有非常专业的焊接功底,也不需要很专业和特殊的工具即可完成,大家在享受DIY乐趣的同时,也能认识所用到的各种零件,学到很多东西,并且最终还能拥有一台极具古典特色的数码时钟,这也是为什么这件作品能够被大家所喜爱的重要原因。
At the same time, IV-11 VFD tube clock is not just a finished product, I also prepared a full set of DIY kit for DIYer, and particularly worth mentioning is all components of the clock kit are DIP and THT parts, no any SMD components, which means it’s very easy to assembly, DIYer don’t need a very professional soldering skills, don’t need very special tools to complete it, not only enjoy DIY fun during the assemblying process, but also to learn a lot of things about electronics, and finally you will get a very classical digital clock, which is why it became popular for DIYer.
在这段时间里,我也收到了很多来自不同国家、不同领域朋友的邮件,除了分享他们的成就感以外,我也汇总了一些他们的意见和建议,这也为我推出今天的新版本而提供了动力。
这里我也先从头简述一下VFD显示技术及IV-11荧光电子管的特点,再简单的介绍一下新款IV-11荧光电子管时钟,最后再详细介绍新版本与上一代作品的不同之处。
During past few years, I received a lot of emails from different countries and different field, I summed up some of their comments and suggestions beside share their sense of accomplishment, which also provide me power for new version.
Here I will start with a brief introduction of VFD display technology and IV-11 VFD tube characteristics, and then initroduce the new IV-11 VFD tube clock, finally I will detailed the differents of new version and previous version.
VFD技术简介 | Introduction of VFD technology
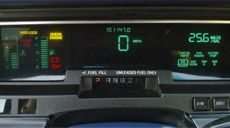
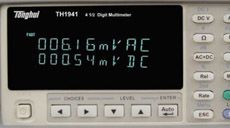
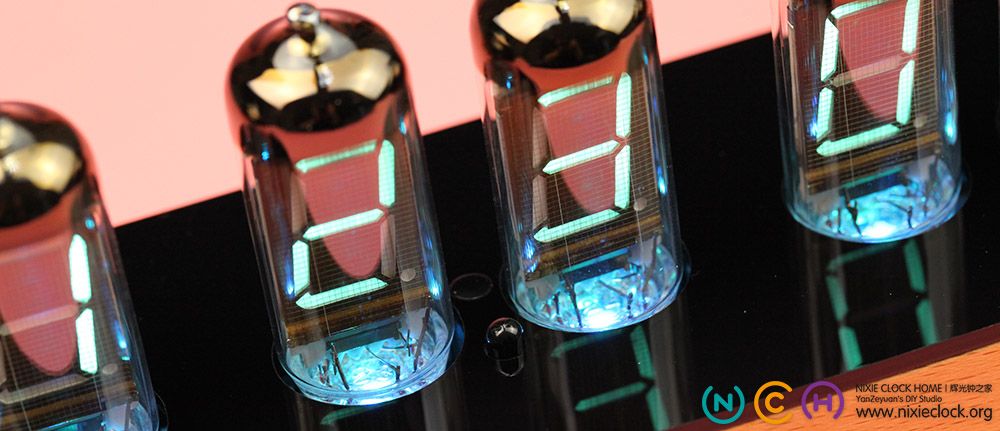
荧光显示(VFD | Vacuum Fluorescent Display)技术诞生于上世纪50年代,1959年Philips做出了第一个荧光显示器件,1962年日本用荧光显示技术做出了第一个单数字的显示元件。VFD技术在现如今仍旧在大量应用,只不过已经不是这种真空电子管的外观,而是做成扁平且高分辨率、多样化的显示屏,由于VFD显示无需背光、亮度高、色彩独特、显示内容可任意定制,多用在汽车、高端仪器仪表、音响、智能终端上面,比如我们常用的汽车音响显示屏、蓝光播放器、台式万用表、超市收银机等等上面,都可以见到她的身影。荧光电子管内部有灯丝,在低电压作用下会向外射出电子,同时荧光管内部有一个栅极,电子在栅极的吸引下会加速射向阳极,当电子撞击到阳极上覆盖的荧光粉后,即发出蓝绿色的可见光,并且随着技术的发展,目前也出现了很多种不同颜色搭配使用的荧光显示器件。所以说VFD电子管内部是真空的(与辉光管不同,辉光管内部是有气体的),且发出的光属于冷光源,电子管工作时本身是不热的。
Vacuum Fluorescent Display technology was inivented in 1950s , In 1959 Philips made the first vacuum fluorescent indicator, and then in 1962 Japanese made the first single VFD digital display component. VFD tecnology is still used in many applications now, but it’s not the appearance of this tube, it become flat and high resolution, because VFD display don’t need backlight, high brightness, unique color, display content can be customized, so it’s widely used in automotive, high-end instrumentation, Hifi devices and intelligent terminal, such as our car audio display, Blu-ray player, desktop multimeter, supermarket cash register, etc. VFD tube has a phosphor coated anode that’s bombarded by electrons emitted from the filament, and now different colors can be choosed during manufacturing. So VFD tube is different with NIXIE tube, nixie tube is filled of some kinds of gas, VFD tube don’t producing heat when it works.
 |
 |
 |
 |
| 用于汽车仪表盘显示 A digital dashboard cluster in automobile |
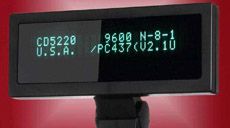
用于高端仪器仪表显示 A digital display in desktop multimeter |
用于超市收银机显示 A digital display in cash register |
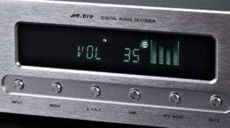
用于音响面板显示 A information display in Hifi device |
IV-11荧光数码管简介 | Introduction of IV-11 VFD tube
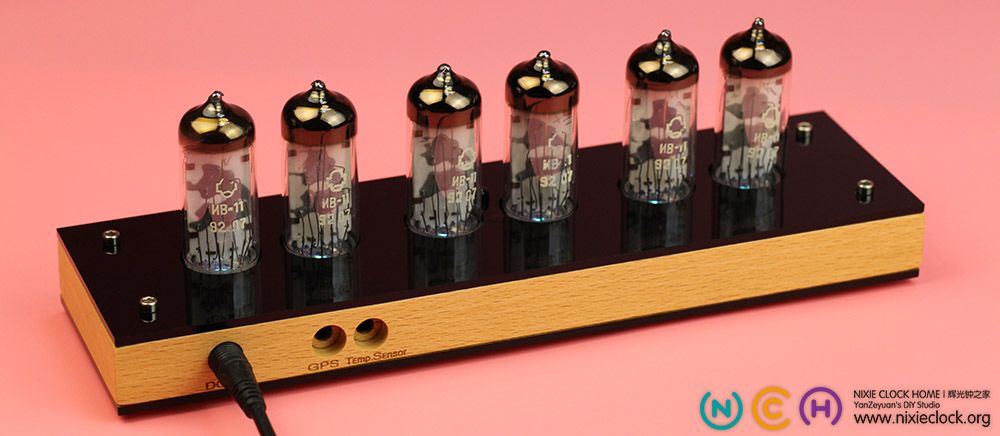
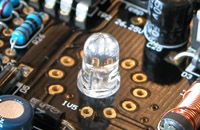
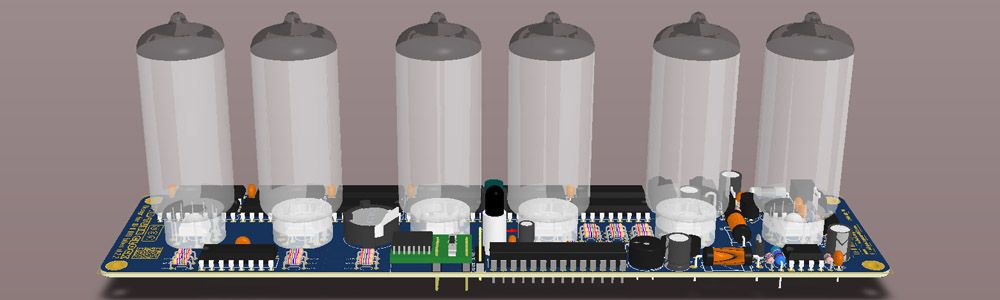
IV-11(ИВ-11)荧光电子管 | 1980s-1990s前苏联生产,目前已经停产近30年时间。玻璃管身是圆柱体,直径22.5mm,侧面显示方式,软脚非插拔式11脚封装(8个阳极分别对应7个段以及1个小数点,1个栅极,和2个灯丝引脚),下面是我拍的照片及对应原版资料的翻译内容。
IV-11 VFD tube was made in USSR 1980s-1990s, about 30 years out of production. The glass body is cylindrical with 22.5mm diameter, side display, 11 fly pins (8 anodes corresponding to 7 segments and 1 decimal point, 1 grid pin, and 2 filament pins), the following is the photo of IV-11 tube and the translation of the original information content.

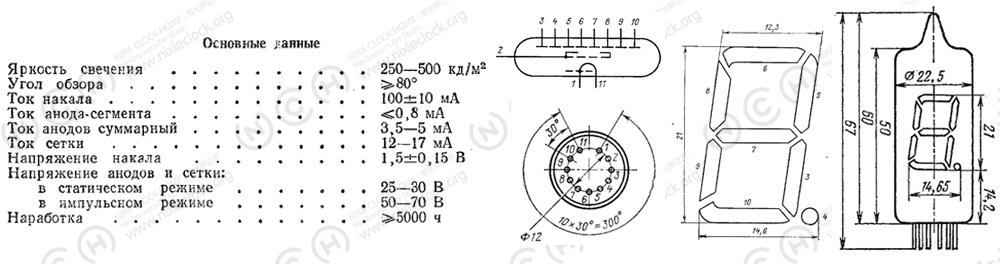
| 显示亮度 Intensity of the glow |
250-500 kd/㎡ |
| 可视角度 Viewing angle |
≥80° |
| 灯丝电流 Filament current |
100±10mA |
| 阳极每段电流 Current of anode-segment |
≤0.8mA |
| 阳极总电流 Current of the anodes summary |
3.5-5mA |
| 栅极电流 Grid current |
12-17mA |
| 灯丝电压 Filament voltage |
1.5±0.15V |
| 阳极电压 静态驱动 Anodes voltage – In static behavior |
25-30V |
| 阳极电压 动态扫描 Anodes voltage – In pulsed operation |
50-70V |
| 显示寿命 Operating time |
5000 hours |
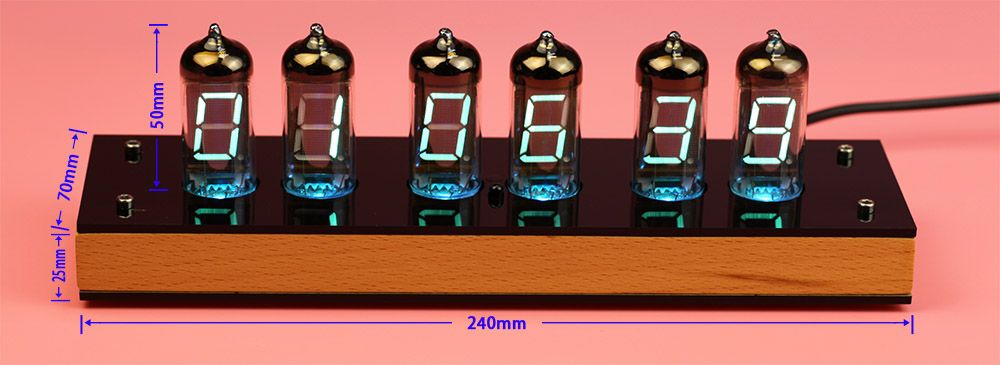
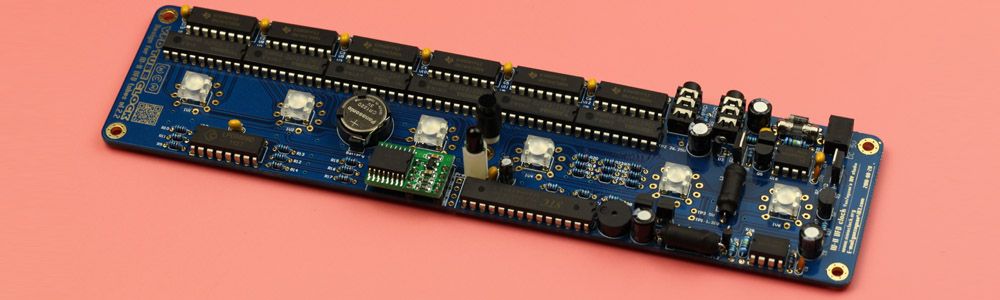
新版IV-11荧光电子管时钟 技术规格 | New IV-11 VFD tube clock technical specifications
在技术规格上,新版与上一代基本保持一致,无论是外观尺寸还是接口类型以及工作电压等等,具体的技术规格数据请见下表:
The new version and the previous version basically have the same technical specifications, whether it’s the appearance of the size or interface type and operating voltage, etc., please check the following table for technical specifications:
| 荧光电子管型号 VFD tube |
IV-11(ИВ-11 1980s-1990s Made in USSR) |
| 工作电压 Voltage of DC input |
DC 5V (3.5mm/1.35mm) |
| 工作电流 Operation current |
Max 900mA |
| 外接GPS规格 GPS requirement |
TTL port, 2400-9600bps, 3.5mm headset plug |
| 外接温度传感器规格 Temperature sensor requirement |
18B20, 3.5mm headset plug |
| 外形尺寸 Dimension |
Base 240mm(L) x 70mm(W) x 25mm(H) Height of VFD tube 50mm, diameter 22mm |
| 外壳材质 Material of housing |
Hard wood and acrylic plates |
| 工作温度 Operating temperature |
0℃ to 60℃ (32℉ to 140 ℉) |
| 重量 Weight |
360g |
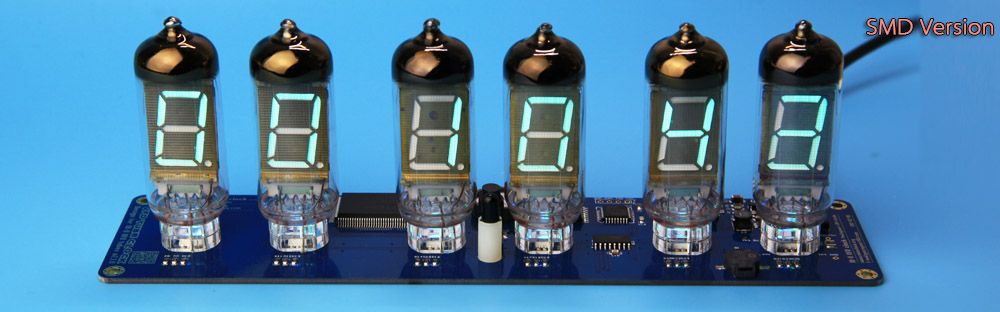
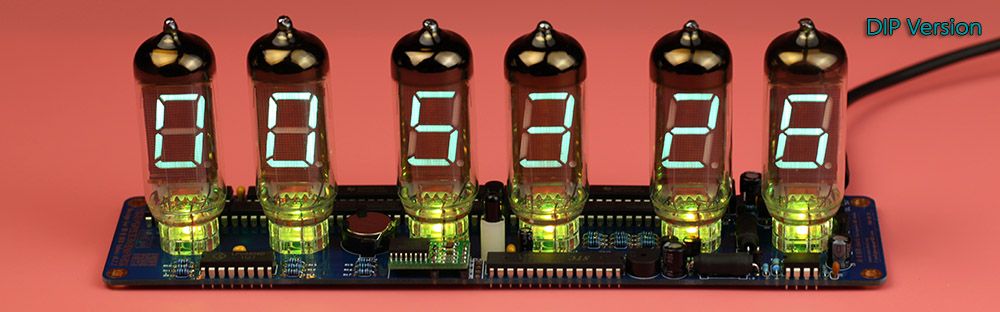
新版IV-11荧光电子管时钟 简介 | Introduction of New IV-11 VFD tube clock
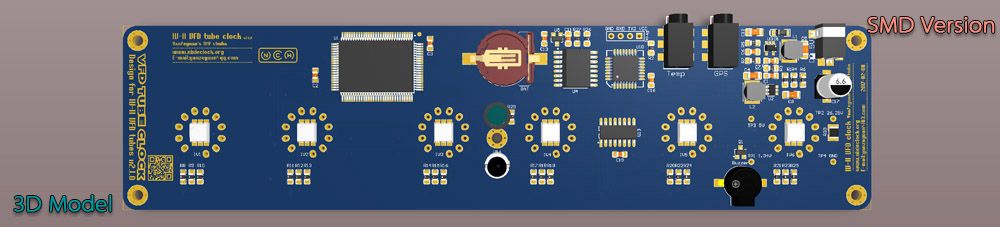
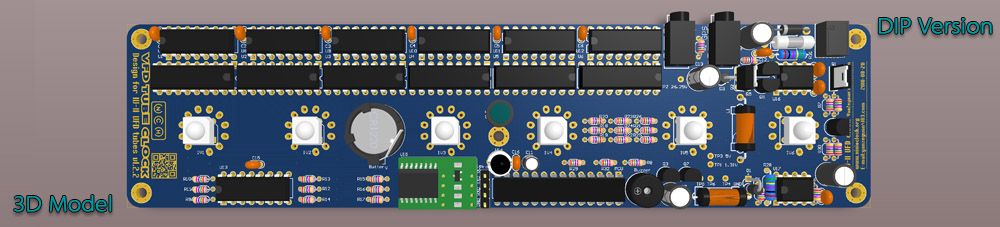
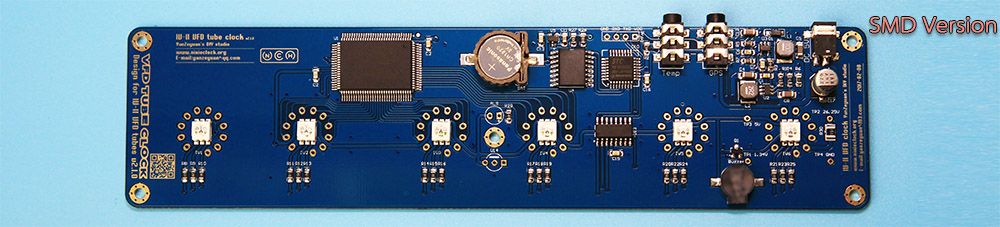
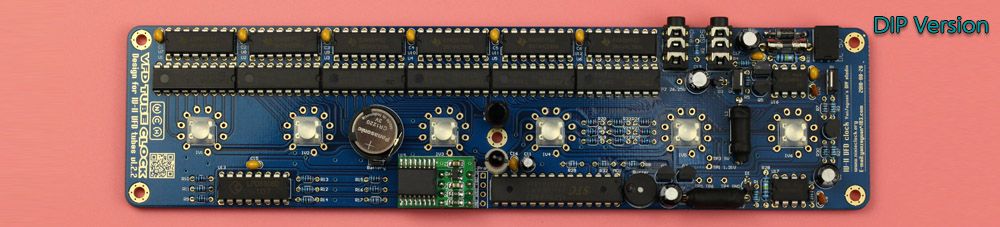
新版IV-11荧光电子管时钟在结构上分为两种不同种类:
1. 贴片版本(成品)。除了荧光电子管和环境光线传感器及红外线接收器以外,所有电子元器件均采用SMT贴片封装,由高速贴片机自动化焊接组装,质量稳定可靠。
2. 直插版本(套件)。所有电子元器件全部采用直插零件,并全部分类并独立包装,配有详细的组装说明书,无需丰富的焊接经验,也无需复杂的焊接及组装工具和设备即可动手完成(但需要一些基本的电子基础,包括懂得基本的焊接操作,能够识别不同种类的电子元器件,需要懂得区分元器件的正负极性,会使用万用表等工具对装配结果进行测试等等)。
The new IV-11 VFD tube clock is structurally divided into two different version:
1. SMD version (finished product). All components are SMD parts except ambient light sensor, infrared receiver, placed and soldered by SMT robot with high stability and reliability.
2. DIP version (DIY kit). All components are DIP or THT parts with individually packaged with detailed label and detailed assembly instructions, DIYer don’t need professional solder skill and experience, don’t need professional tools and equipments (but basic electronic knowledge and basic solder skills are required, DIYer should recognize different electronic parts, polarity, know how to measure the voltage with multimeter.
在功能方面,无论是贴片版本的成品还是直插套件组装好以后的成品,所有的功能全部一致,包括外观、尺寸、接口类型、接口位置、操作方法等等全部相同。
For functions, whether the finished version or the kit, all functions are the same, including the appearance, size, interface type, interface location, operation method and so on.
新版本主要增加了半导体环境光线传感器(非光敏电阻),可以感知周围环境可见光的强度,并自动调整数字和背景光的亮度,尤其在夜晚不会影响睡眠。另外,新版本在GPS授时方面,采用的是实时同步的方式,不再像上一个版本需要手动启动同步,或者每周一次自动同步。
具体功能描述请见以下列表:
The main improvements of new version is add the semiconductor ambient light sensor (not the photosensitive resistor), it can control the digit and backlight brightness according to the ambient brightness, especially in the night the clock will not affect your sleep. In addition, the new version will synchronize the date and time with GPS in realtime, previous version need to manually trigger synchronization or automatically once a week synchronization.
For specific features please check the following list:
| 1. 时间显示 Time display |
时、分、秒 时间显示(12/24小时格式可选,并可显示或取消前导0)。 Display hour, minutes and seconds (12 or 24 format operational, lead zero On/Off supported). |
| 2. 日期显示 Date display |
年、月、日 日期显示(年-月-日/年-日-月/日-月-年/月-日-年 日期格式可选)。 Display year, month and day (YY-MM-DD/YY-DD-MM/DD-MM-YY/MM-DD-YY date format operational). |
| 3. 农历显示 Lunar date display |
可根据当前公历日期自动计算农历日期并显示。 Calculate and display Chinese lunar date accroding to solar calendar. |
| 4. 星期显示 Day of week display |
可根据当前日期自动计算星期。 Calculate and display the day of week. |
| 5. 闹钟功能 Alarm |
两组闹钟功能,每一组可独立开启或关闭。 Two alarm clock, can be activate separately. |
| 6. GPS授时 GPS adjust |
可连接GPS接收机,能够与GPS卫星时间保持同步(GPS接收机为选配件)。 Automatic adjust date and time (GPS receiver is optional). |
| 7. GMT时区设置 GMT time zone functions |
可设置所在区域的GMT时区,时钟会根据从卫星接收到的格林尼治时间自动换算当地的日期及时间。 The clock will calculate the local time based on satellite. |
| 8. 温度显示 Temperature display |
可显示当前温度(℃/℉单位可选,温度传感器为选配件)。 ℃ or ℉ operational (Temperature sensor is optional). |
| 9. 定时开关机 Switch On/Off automatically |
可设定自动关机、自动开机时间,以延长电子管使用寿命。 Auto On/Off time can be set for saving tube life. |
| 10. 自动亮度控制 Brightness adjust automatically |
数字和背景灯光的亮度可手动设定,也可以根据环境光线亮度自动调节,夜晚不影响睡眠。 Automatically adjusts brightness level of VFD tubes and LEDs based on ambient lighting. |
| 11. 数字变换特效 Transition effects |
10种数字变换显示特效可设置,并支持10级变换速度设置,可组合自己喜欢的显示效果。 Ten transition effects for the digits, and ten transition speeds can be setup. |
| 12. 彩色背景灯光 Background lighting |
8种背景灯光色彩,背景灯光可设置为常亮或关闭,也可以设置为呼吸闪烁。 Background lighting effects includes eight colors, Fade in-out, On and Off. |
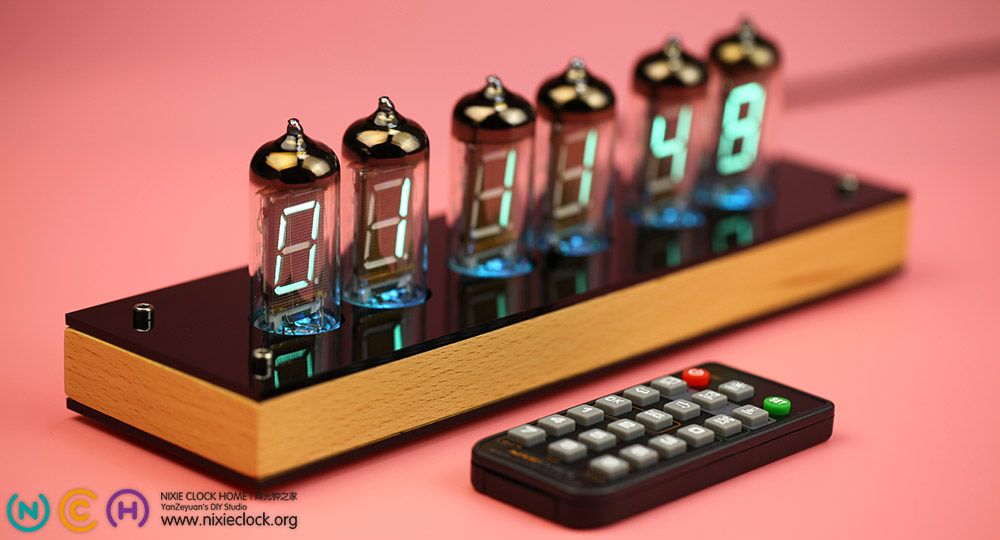
| 13. 红外线遥控 IR remote control |
所有操作通过红外线遥控器完成,无线操作方便快捷。 IR remote controller operation. |
| 14. 高精度时钟 High accurate |
内置高精度RTC模块,年误差<1分钟。 Built-in high precision RTC module, acurate to within 60s per year. |
| 15. 断电记忆 Power off memory |
断电或关机不影响时钟计时,重新上电或开机无需重新设置时间,并且所有功能设置不会丢失。 Built-in backup lithium battery will maintain clock time, all setting can be saved without power. |
红外线操作说明 | IR remote
 |
电源键:用于远程开关机。 POWER: Power On/Off |
亮度键:可用来调整显示亮度。 LIGHT: Set brightness |
||
| 设置键:设置时间、日期等。 SET: Enter setup |
日期键:查看公历日期和农历日期。 DATE: Check date |
|||
| 闹钟键:查看和设置闹钟。 ALARM: Display alarms |
 |
温度键:查看室内温度。 TEMP: Display temperature |
||
| 方向键:调整位置,主要用于设置的时候调整设置位置。 LEFT/RIGHT: Set position |
菜单键:进入菜单。 FUNC: Enter menu |
|||
| 确认键:确认保存或放弃设置。 OK/CANCEL: Save & exit |
数字键:进行数字输入。 NUMBER: Enter numbers |
新版IV-11荧光电子管时钟 技术特点 | New IV-11 VFD tube clock technology fratures
IV-11荧光电子管的驱动原理相当简单,在这里不做赘述。但驱动方式有很多种,值得一提的是新版本延续了上一代的全静态驱动方式,既无任何闪烁,又能够有效延长荧光电子管寿命,具体的特点见以下列表:
The driving method of IV-11 VFD tube is quite simple, not repeat here. But there’re many ways to drive it, it’s worth mentioning that the new version continuation of the previous version of static drive, not dynamic scanning drive, tubes are all no blinking, and will extend the life of VFD tbues, the specific characteristics of the following list:
| 1. PCB板沉金工艺处理,全部采用弧形走线,泪滴焊盘,DIY焊接可有效防止焊盘脱落。 Gold plated PCB, all curved tracking with tear pads for prevent the pad off. |
| 2. 全静态驱动,非动态扫描,有效延长荧光电子管寿命,无任何闪烁感,性能稳定可靠。 Static drive, non-dynamic scanning, effectively extend the life of tubes, no blinking sense, stable and reliable performance. |
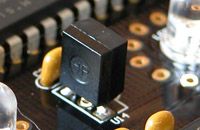
| 3. 采用高效率DC-DC升压/降压模块,低功耗。 High efficiency DC-DC step-up/step-down module with low power consumption. |
| 4. 关机后荧光管驱动部分全部断电,包括荧光电子管阳极和灯丝供电,有效延长荧光电子管寿命。 Tube driver module is cutoff when press POWER button to poweroff the clock, including anode and filament power, effectively extending the life of VFD tubes. |
| 5. 内置CR1220锂电池,断电3年仍旧维持内部计时。 Built-in CR1220 lithium batery, maintain clock time for 3 years. |
| 6. 配备5V USB全球通用电压的电源适配器。 Including 5V USB universal power adapter. |
| 7. CNC加工的实木底座搭配亮黑色亚克力面板,彰显高贵本色。 CNC machined hard wood base with bright black acrylic plates, highlight the noble character. |
DIY套件介绍 | DIY kit introduction
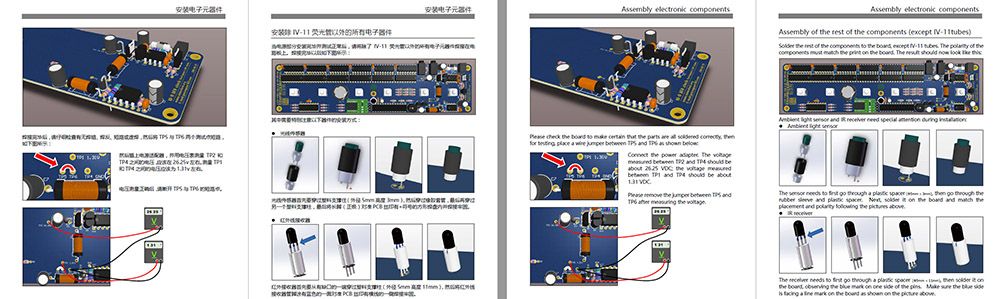
在DIY套件的元器件分类及包装方面,新版本进行了认真细致的研究与改进,将所有不同种类的器件均进行了独立的包装,并使用标签进行了详细的说明,在DIY过程中能够清晰明了的找到所需要的零件,不会因为标识不清晰而在电路板上装上错误的零件。在整体包装方面,新版本也定制了独立的包装盒及防震珍珠棉,每一个零件都会被放置在恰当的位置得以保护,再也无需担心长途运输对IV-11荧光电子管和其他零配件的损坏。
The DIY kit components packaging are carefully researched and improved, all different types of parts are carried out a separate packaging with detailed decription of the label, it’s easy to find the correct parts during DIY process. The new version also customized strong box and EPE foam, each part will be placed in the right place to be protected, no worry about the damage of tubes and other parts during long-distance transport.
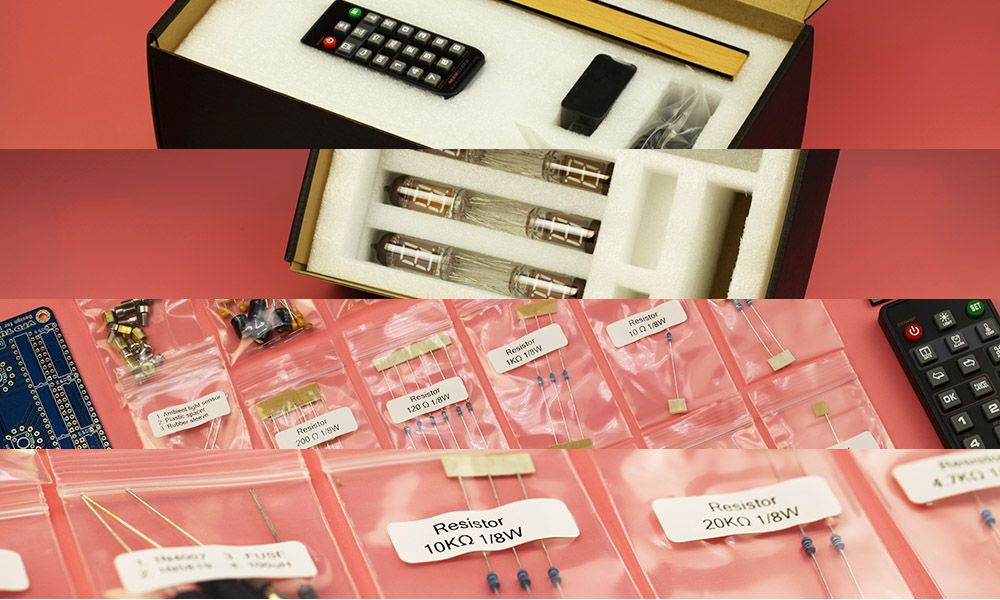
此外,我们还准备了详细的中英文版本的组装说明书,从BOM清单到如何认识主要元器件,到如何安装电子元器件及如何测试关键数据,均有图文并茂的说明。
In addition, we prepared a detailed Chinese and English version of assembly instructions, including BOM list, how to understand the main components, how to install electronic components and how to test the result.
说明书可在本文最后找到下载链接
The instructions can be download at the end of this post
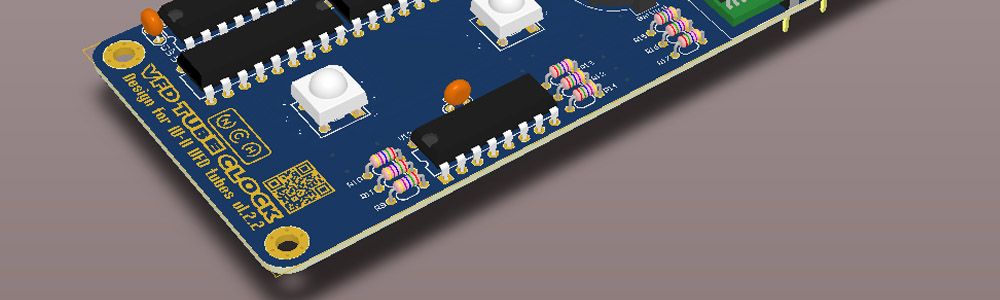
电路设计方面新版本在上一代的基础上进行了较大的改进和调整,主要目的是使得器件布局更加合理、DIY焊接及装配更加简单。
There’re some important improvments from previous version to make the layout more reasonable and solder and assembly more simple.
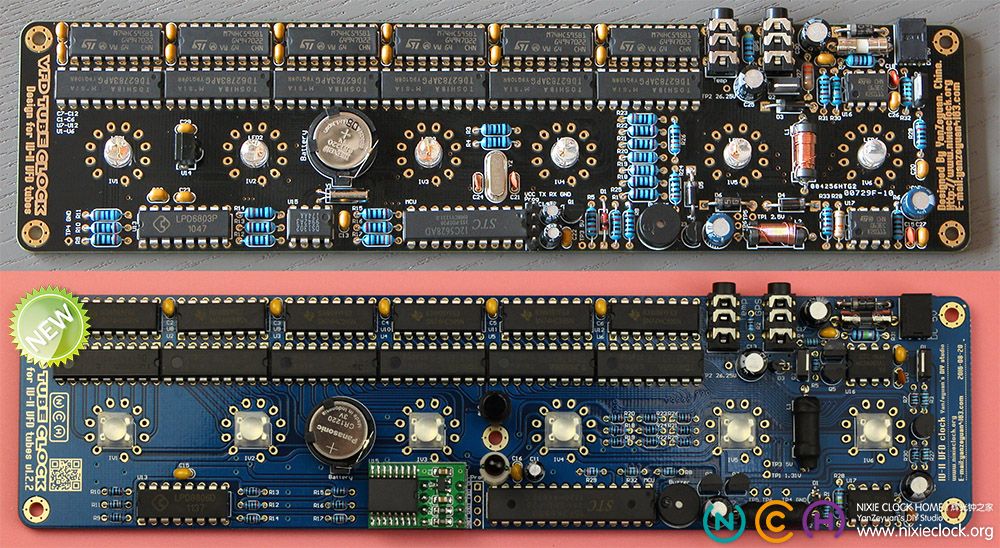
从图片上可以看到,上一代的IV-11荧光管时钟电路板比较紧凑,元器件种类较多且封装体积比较大,焊盘与焊盘之间距离较近,在焊接过程中容易连锡及短路。新版采用了新型的IC及其他器件,不但提高了稳定性还省去了部分电子元器件,并更改了部分电子元器件的封装类型,使得整体看起来更加简洁,降低了元器件的排列密度,对DIYer来说组装过程更加轻松。
The circuit board of previous version is more compact according to pictures, size of some components are a little bit big, pads are too close and it’s easy to short during soldering. New version select new ICs and other electronic parts, some parts have been omitted, improved the stability, changed packaging size of some components, make the whole board more concise, make the assembly process easier.
具体的改进之处见一下列表说明:
Specific improvements please check the following list:
1. 采用新型RGB LED
|
||
| http://i1237.photobucket.com/albums/ff474/yanzeyuan/IV-11%20v2/Improve%201-1.jpg | http://i1237.photobucket.com/albums/ff474/yanzeyuan/IV-11%20v2/Improve%201-2.jpg | 采用定制的食人鱼RGB LED替代了传统φ5mm RGB LED,焊接更加容易,因为传统的5mm LED管脚间距只有1.27mm,在焊接时非常容易造成短路,使得背景光色彩无法正常表现,采用食人鱼RGB LED后此类问题不会发生。 Customized piranha RGB LED instead of standard φ5mm RGB LEDs, easy to soldering. Standard 5mm LED has 4 pins with 1.27mm pitch, very easy to short circuit. The pitch of new LED pins is 5.08mm, such problems will not happen during soldering. |
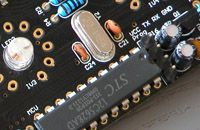
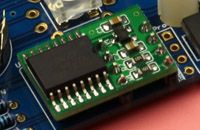
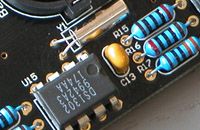
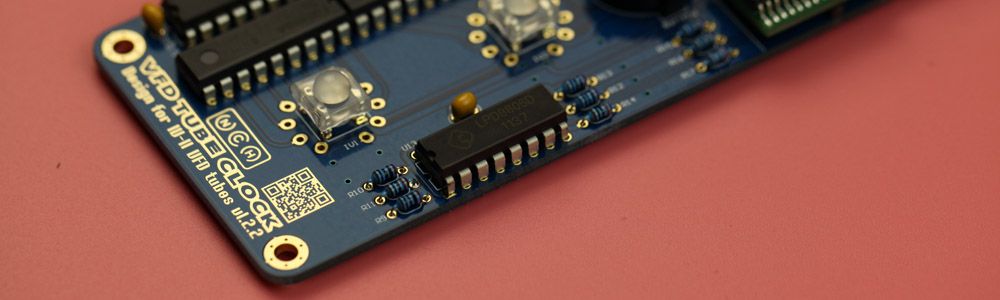
2. 采用新型号MCU
|
||
| http://i1237.photobucket.com/albums/ff474/yanzeyuan/IV-11%20v2/Improve%202-1.jpg | http://i1237.photobucket.com/albums/ff474/yanzeyuan/IV-11%20v2/Improve%202-2.jpg | 采用新型MCU芯片替代了原有的MCU,新型MCU内置了晶体振荡器,在减少了元器件的同时也提高了稳定性,避免外置晶体振荡器损坏造成的时钟无法启动的问题。 Using new MCU chip instead of the old one, new MCU built-in crystal oscillator, improve the stability and reduce the number of parts. |
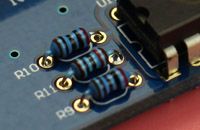
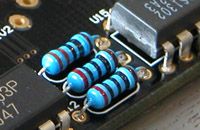
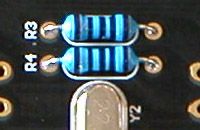
3. 更换绝大多数电阻的封装种类
|
||
| http://i1237.photobucket.com/albums/ff474/yanzeyuan/IV-11%20v2/Improve%203-1.jpg | http://i1237.photobucket.com/albums/ff474/yanzeyuan/IV-11%20v2/Improve%203-2.jpg | 采用1/8w的小体积直插电阻替代了原有的1/4w的直插电阻,降低了元器件的密度,更加容易焊接装配。 Using 1/8w packaging size instead of 1/4w packaging size, reducing the density of components, make soldering easier. |
4. 采用新型的红外线接收头
|
||
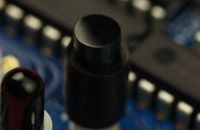
| http://i1237.photobucket.com/albums/ff474/yanzeyuan/IV-11%20v2/Improve%204-1.jpg | http://i1237.photobucket.com/albums/ff474/yanzeyuan/IV-11%20v2/Improve%204-2.jpg | 采用新型封装的红外线接收头,并且定制了特定高度的支撑柱,使其位于时钟中心部位并将接收头圆形顶部露出时钟顶部面板,比原有版本的暗藏式的设计更加提高了红外线操作时的灵敏度。 Using a new IR receiver, and customized a specific height of spacer for fix the receiver and located the top of receiver reveal the top plate, improved the operation sensitivity. |
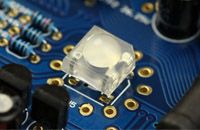
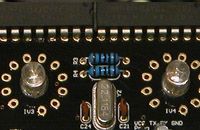
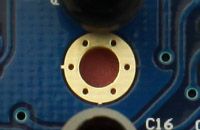
5. 增加了半导体环境光线传感器
|
||
| http://i1237.photobucket.com/albums/ff474/yanzeyuan/IV-11%20v2/Improve%205-1.jpg | http://i1237.photobucket.com/albums/ff474/yanzeyuan/IV-11%20v2/Improve%205-2.jpg | 在时钟的中心位置,增加了半导体环境光线传感器,能够使时钟根据环境光线的亮度自动调节显示亮度,尤其在夜晚不会因为显示过亮而影响睡眠。 Added a semiconductor ambient light sensor in the center of the clock, the clock can adjust the display brightness automatically according to the brightness of the ambient light, the light of the clock will not affecting your sleep at night. |
6. 采用了高精度RTC模块
|
||
| http://i1237.photobucket.com/albums/ff474/yanzeyuan/IV-11%20v2/Improve%206-1.jpg | http://i1237.photobucket.com/albums/ff474/yanzeyuan/IV-11%20v2/Improve%206-2.jpg | 与原有版本的DS1302 RTC芯片相比较,此次采用了更加精准的DS3231SN RTC芯片来做时钟基准,并且DS3231SN已经预先封装成了体积小巧的模块,能够非常容易的组装在电路板上。 Compared with the previous version of DS1302 RTC chip, this time using a more accurate DS3231SN RTC chip to improve the accurate of clock, and DS3231SN has been pre-packaged into a compact module, can be very easy to assembly on the circuit board. |
7. 在电路板中心位置增加了固定螺丝
|
||
| http://i1237.photobucket.com/albums/ff474/yanzeyuan/IV-11%20v2/Improve%207-1.jpg | http://i1237.photobucket.com/albums/ff474/yanzeyuan/IV-11%20v2/Improve%207-2.jpg | 由于电路板总长度203mm,原有版本只在四个角固定,使得电路板最终安装在外壳底板上时会因为中心无任何支撑造成弯曲。此次在电路板中心位置增加了螺丝孔并进行了支撑。 Total length of the circuit board is 203mm, previous version only fix the board at four corners, the board may bend after fixed on the bottom plate because no any support in the center of board. So this time the board has a center support. |
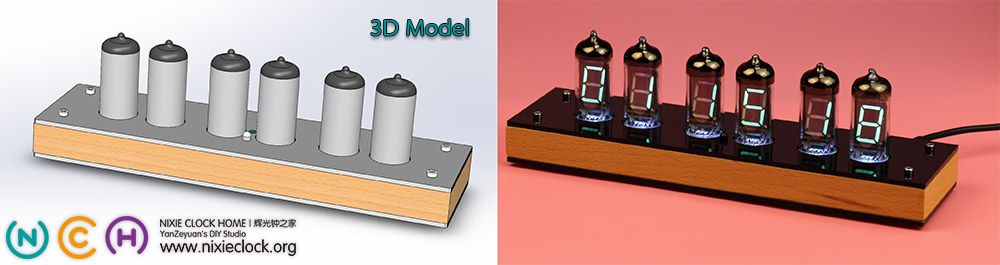
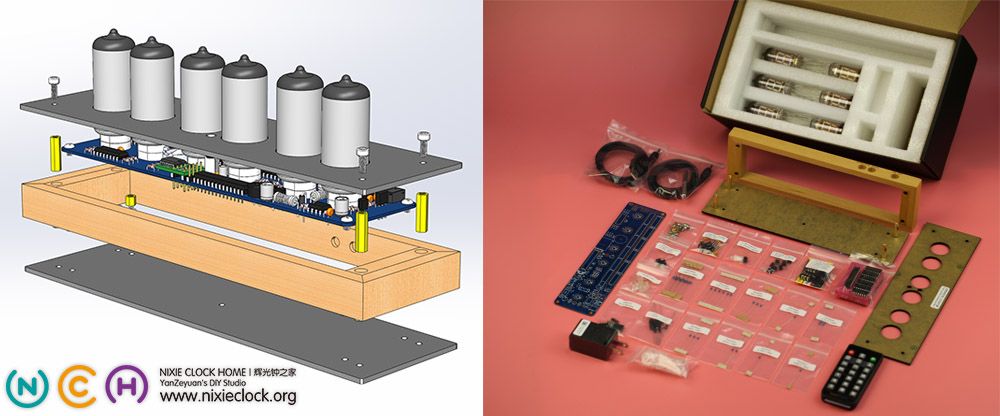
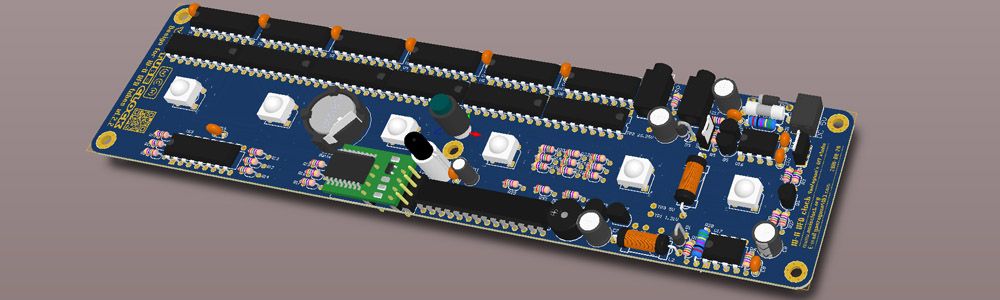
之所以能够精确的掌握每个元器件的大小并合理的安排每个元器件的位置,是因为我对每一种不同的电子器件均制作了3D模型,并且在样机制作出来之前就已经对所有零件之间的配合做了充分的模拟和验证,确保装配完成以后,电路板、电子管、外壳、上下面板都能精确的组合到一起。
It’s possible to precisely grasp the size of each component and arrange the location of each component rationally because I made 3D model for each of different electronic parts, double checked before finished the prototype, make sure everything can be put together perfectly including circuit board, tubes, wooden frame and plates.
下图是一组3D模型的截图与实物照片的对比图片:
3D models screenshot and photos:
高清视频展示(中国大陆地区用户如无法观看请点击这里)
High-definition videos of the clock
Coming soon…
使用说明书下载
User manual download link
IV-11 VFD Tube Clock v1.2.2 User Manual CH.pdf (简体中文版)
IV-11 VFD Tube Clock v1.2.2 User Manual EN.pdf (English version)
DIY装配指导 下载
Assembly instruction download link
IV-11 VFD Tube Clock v1.2.3 Assembly Instruction CH.pdf (简体中文版)
IV-11 VFD Tube Clock v1.2.3 Assembly Instruction EN.pdf (English version)
![]()
16 条评论
Chuck · 2017 年 11 月 18 日 下午 10:34
Can I get a schematic of the IV-11 VFD Tube Clock
I have no voltage and Q1 Q2 very hot.
Thanks.
Chuck
♂唯有→奋斗 · 2017 年 11 月 18 日 下午 11:29
Please check SCH in your mail box.
lew miller · 2018 年 2 月 23 日 上午 4:48
My display goes from dim to somewhat brighter like its breathing. Am unable to get into menus. Any suggestions? I think the clock is dying.
♂唯有→奋斗 · 2018 年 2 月 23 日 上午 11:14
When and where did you bought it? old version has no menus.
Antoine · 2018 年 4 月 16 日 上午 12:17
Hello
I just built the kit, everything is ok except the blue led under the minutes vfd is off
I tried to check the soldering but no way
could I have a schematic of the clock ?
Thanks
Antoine
♂唯有→奋斗 · 2018 年 4 月 16 日 下午 8:15
Hi Antonie, please check your mail 😉
Wayne Myers · 2018 年 5 月 7 日 上午 11:28
It looks like a great clock but I need a pictorial for placement of parts and a schematic diagram
Thanks Wayne Myers
♂唯有→奋斗 · 2018 年 5 月 7 日 下午 1:04
You can download assembly instruction here:
https://www.nixieclock.org/upload/IV-11%20VFD%20Tube%20Clock%20v1.2.2%20Assembly%20Instruction%20EN.pdf
And we can provide the sch after you bought it.
Wayne Myers · 2018 年 5 月 12 日 下午 1:18
I have everything put together except the wiring of the tubes. I tested the board the remote works fine the LEDs change color and the buzzer works. It looks like a great clock and I may buy more
can you tell me how to get everything lined up..I have a large problem trying to get the spacers on the wire from the tubes and on to the board.
♂唯有→奋斗 · 2018 年 5 月 12 日 下午 4:57
Hi, for easy to put tubes on the board, you can cut tube pins shorter and shorter one by one, then solder only three pins at first, after you fixed all six tubes, adjust tubes make them all stand up and in perfect upright position.
Michael J. Linden · 2019 年 1 月 27 日 上午 3:29
Hi Jan:
I just received your New VFD clock kit through eBay. I haven’t begun construction yet, but everything looks very nice. You did a great job on the PC board! Could you please send me a copy of the schematic for future reference?
Thanks! -Michael
♂唯有→奋斗 · 2019 年 2 月 13 日 下午 1:25
Hi Michael, please send email to me, yan@nixieclock.org thanks. Yan.
Henry · 2019 年 2 月 5 日 下午 12:32
Hi,
I purchased this clock for my son at Christmas, he is learning electronics. One of the VF11 tubes started to go dim and now does not light at all. Do you have the schematic
diagram for this clock. I’m not sure if it is the tube or the driving device for the tube. And if it is the tube can I get a replacement? Thank you.
♂唯有→奋斗 · 2019 年 2 月 13 日 下午 1:26
Hi Henry, please send some pictures to me, then I can check the problem for you, my E-mail address yan@nixieclock.org. Thanks.
Logan Harper · 2019 年 2 月 13 日 上午 9:48
Hi there!
I am having an issue with my build of this clock. The only LEDs that light correctly are IV2 and IV6. The others light, but not at the right time and not all of the colors. What did I do wrong?
♂唯有→奋斗 · 2019 年 2 月 13 日 下午 1:26
Hi Logan, can you please send some pictures to me? yan@nixieclock.org. Thanks.